This tutorial guides you through configuring and using the Other Agent tool within AORForms.
Go to
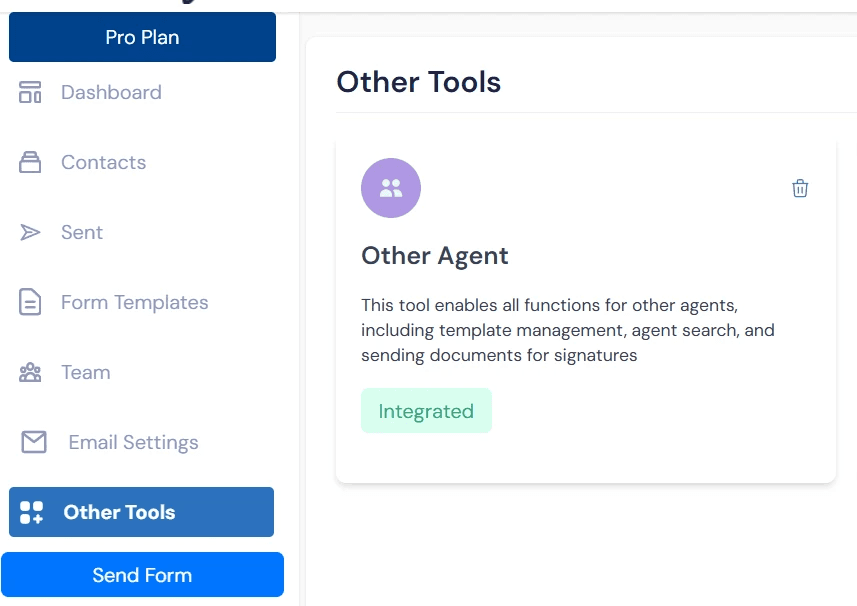
1. Open Other Tools Menu
Click Other Tools to access additional features available in AORForms.
2. Integrate Other Agent Tool
Ensure that the Other Agent Tool is integrated. If it is not yet integrated, click on Integrate.
3. Go to Other Agent Template tab of your Form Templates.
Go back to Form Templates to see Other Agent Template section now integrated.
4. Create a new template to send to Other Agents
Click Create to start building a new template that can be sent to the other agent. Note that this feature is intended for creating a template letter that will be sent on behalf of your client (the person signing the documents) to inform the other agent that their services are no longer required and you will now be representing the client as their new agent.
5. Edit content of the template
Paste or write content of your template into the document editor.
6. Select Contact fields
Select the contact fields to add to the document on send. In this editor, you must select the location for the field in the editor and then click on the field name to add. Fields can not be dragged into the document using this editor
7. Select Other Agent Fields
Select the other agent fields to add into the document.
8. Add signature field and Save Template
Don’t forget to add a signature space to your letter in the appropriate location. Click Save Template to store your changes and updates to the form template.
9. Edit Client Template
Now, go back to your templates list. You will need to edit the client template that you want to associate your other agent template to. Click the pencil icon to edit.
10. Allow Other Agent in Advanced Settings
For each template that you want to associate the other agent template to, you will need to go to Advanced Settings, toggle “Allow other agents” and select the other agent template that you created.
11. Save Template with Allow Other Agent enabled
Now, save your template. When you send this template in the future, you will be able to add the other agent. When your client template is sent and signed by your client, the other agent template will be sent on behalf of your client to the agent selected.
12. Send Form
Click Send to open the Send Form dialog. This is where you will be able to search for the agent’s details by NPN.
13. Allow other agent
Toggle “Allow other agent” to open the NPN search box.
14. Enter NPN of the other agent
You will need the NPN number of the other agent. Enter it here to search for the other agent’s name and contact info.
15. Edit Manually
If the NPN search does not return the correct information for the agent, “Edit Manually” to update the information as needed. Here’s a Tip: If you don’t know the NPN of the other agent, or if you are trying to send to someone without an NPN, type in your own and then edit the fields as needed.
16. Save Changes
Click Save to indicate you are done editing and save the other agent’s information.
17. Select Contact Name
Don’t forget to select your client’s name as Contact Signer 1.
18. Send Form
You are now ready to send. Your client will receive the client template. Once they have signed, the other agent template will be sent to the agent on behalf of your client, as per the details that you saved before sending.
You have successfully configured and used the Other Agent tool in AORForms by creating and customizing templates, filling in client and agent information, and sending forms. To further enhance your workflow, explore our other tutorials.